Customizable Templates
20 Feb 2024
In Microweber.com you are able to customize your website template using the live edit and visual editor settings.
In general you are able to change anything from your template. You can set different fonts, colors, lign-height space between the text elements and even you are able to define the style of your buttons size, color and font size.
Let me show you how to do that in few steps.
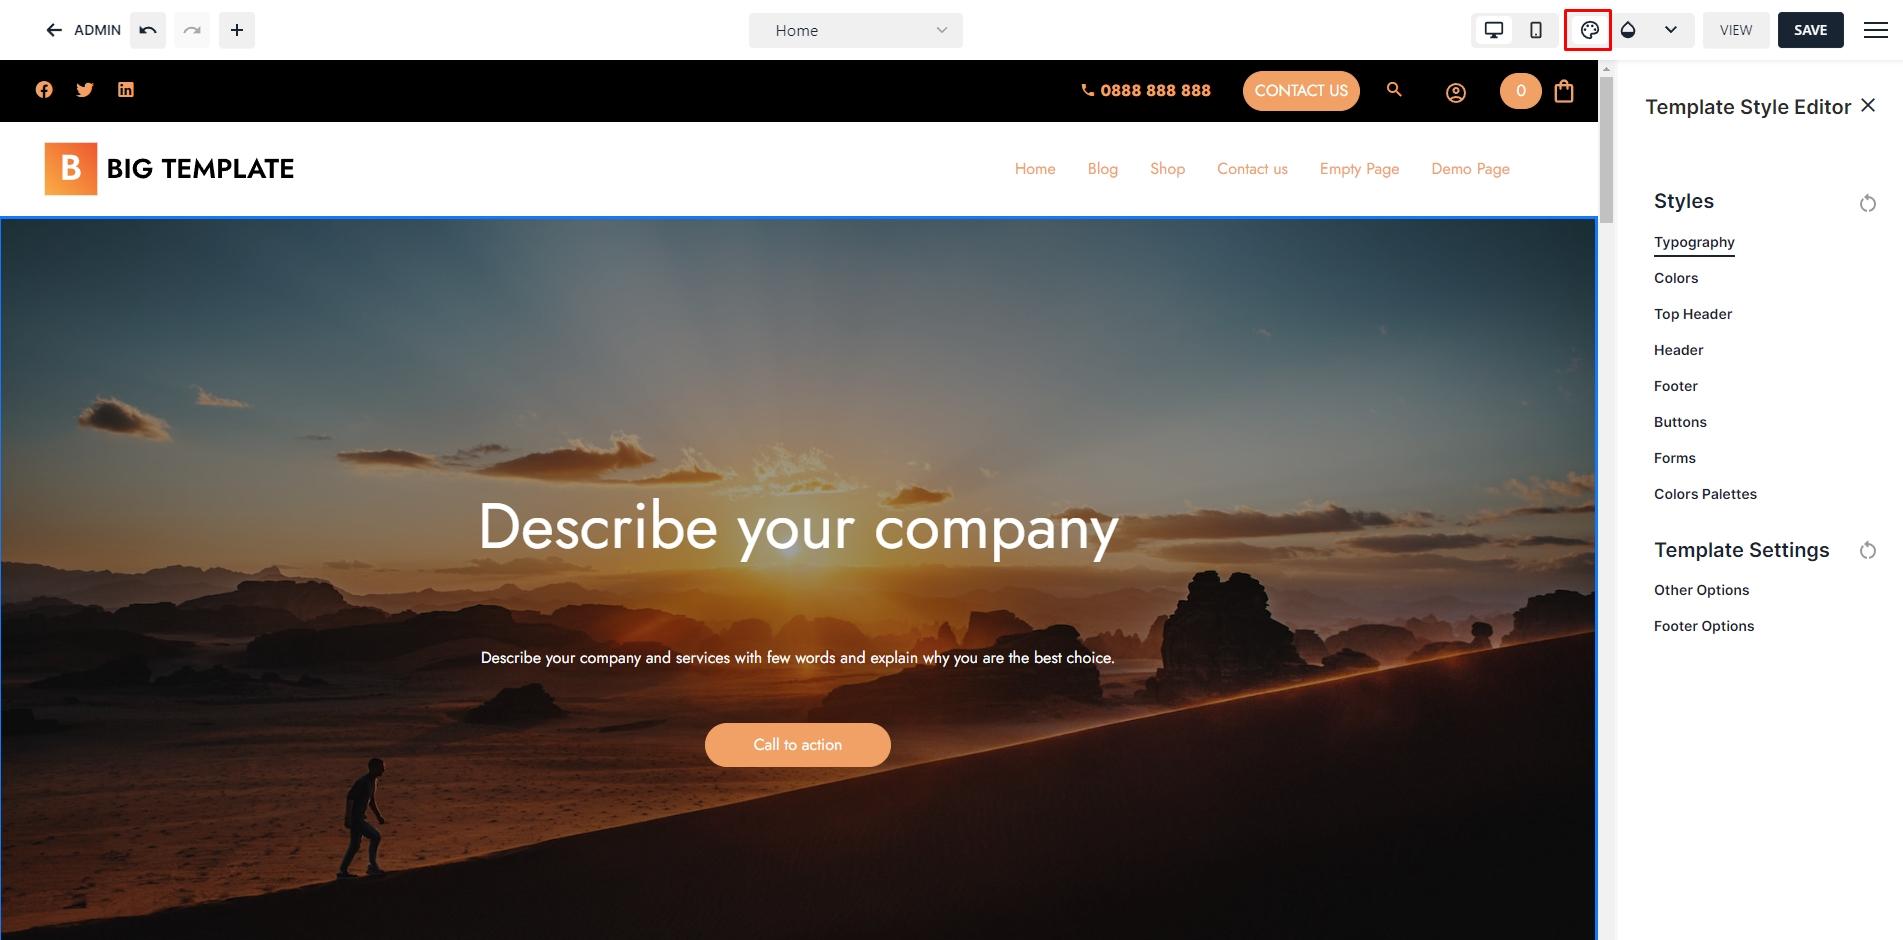
1. From the main menu on the top you need to click on  icon. This will open the Template Style Editor which allows you to define a global styles of you template like colors, fonts sizes, spicing and more. Here is how it's look like:
This is how the Template Style Editor looks like. From it your are able to setup and control all of the global template settings.
Change Font / Typography
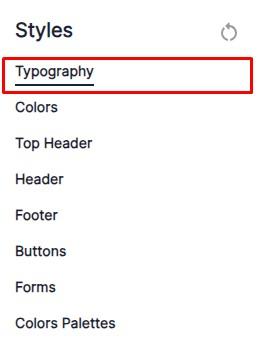
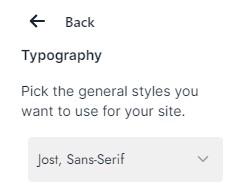
From the Typography settings you can define your general font size of the website template. Just choose from the dropdown the loaded fonts.
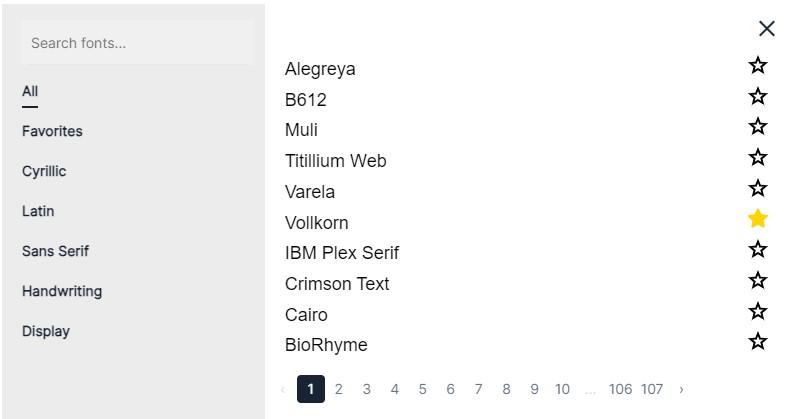
Add New Font
Scroll to the end of the list to add new Google font clicking on ADD MORE FONTS. Then a new window with all of the fonts that Microweber support will upper. Here is what you will see:
Spacing in Text
In the Typography section there is few more settings we can use and discover. We are going to explore here the Spacing settings.
The Spacing section allows you to define the right space between the reads or words. Most useful setting is related with the line-height between the text roads. Here are the useful settings that Microweber Spacing settings give you.
Line Height
Letter Spacing
Font Wight
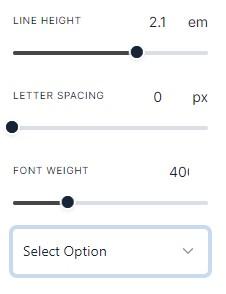
Also there is availably options for text display like Lowercase, Uppercase, Capitalize and None.
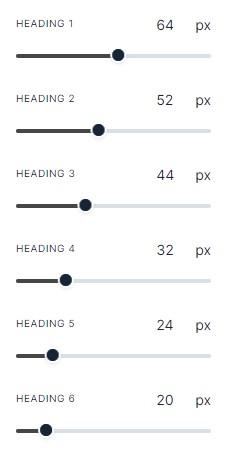
Headings
In the Heading section part of the Typography you can define the headings of your website. This is a global settings and each of the defined heading will apply in the flowing settings:
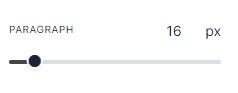
Paragraph
The same as the Heading settings you can define the fonts size of the normal text called paragraphs of you website. Just pick up the size of the font you want to have in your website.
Links
To define the style of your website links you can do that from the links section in Typography main menu.
The availably options are: None, Underline, Underline Dotted, Wavy Underline and Overline. Depending of your design you can choose which to use.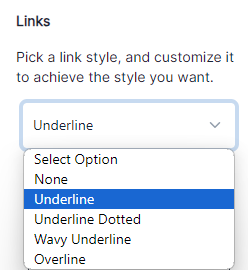
Below you can read more of how to make your own template if you are using the open-source version of Microweber Website Builder.
How to create own template
Creating templates for Microweber involves understanding its structure and utilizing its features effectively. Microweber primarily operates with HTML, CSS, and PHP, and it offers a variety of template tags for dynamic content integration. Here's a step-by-step guide to creating templates for Microweber:
- Set Up Your Development Environment: Ensure you have a local or remote environment where you can install and test Microweber. You'll need a web server (like Apache or Nginx) with PHP and a MySQL database.
- Install Microweber: Download and install Microweber on your server. Follow the installation instructions provided on the Microweber website or in the documentation.
- Understand Microweber's Template Structure: Microweber's templates are stored in the
/userfiles/templates/directory. Each template typically consists of PHP, HTML, CSS, and JavaScript files. - Create a New Template Directory: Inside the
/userfiles/templates/directory, create a new folder for your custom template. Name it appropriately. - Create Template Files: Within your template directory, create the necessary files such as
index.php,header.php,footer.php,style.css, etc. These files will define the structure, layout, and styling of your template. - HTML Structure: Design the HTML structure of your template in the
index.php,header.php, andfooter.phpfiles. Use HTML markup to create sections for header, navigation, content, sidebar, and footer. - CSS Styling: Style your template using CSS in the
style.cssfile. Customize the appearance of various elements such as fonts, colors, spacing, and layout to match your design preferences. - PHP Integration: Utilize Microweber's PHP functions and template tags to integrate dynamic content into your template. This may include displaying posts, pages, categories, tags, and other dynamic elements.
- Responsive Design: Ensure your template is responsive and mobile-friendly by using CSS media queries and responsive design techniques. Test your template across different devices and screen sizes.
- Testing and Debugging: Test your template thoroughly to ensure it works correctly with Microweber's CMS features. Debug any issues or errors that may arise during testing.
- Documentation: Provide documentation or instructions on how users can install and customize your template. Include details on customizing colors, fonts, adding widgets, and any other customization options.
- Package and Distribute: Once your template is ready, package it into a ZIP file for distribution. You can share it with others, offer it for download through Microweber's marketplace, or sell it on your website.
By following these steps, you can create custom templates for Microweber that allow users to easily customize and build their websites. Make sure to stay updated with Microweber's documentation and community for any new features or best practices related to template development.