Build your Own Website with No Coding Experience Required!
Posted on: November 04, 2024 Updated on: November 04, 2024 by Nada AllamIn today’s digital age, having a website is an important step that every business, personal brand, and even individual wants to take in the market field. The idea of developing a website from scratch can be so really frightening because one might worry about coding and web development knowledge. Fortunately, there are platforms like Microweber, provide intuitive tools that make it easier for users to set up a website without any prior background in coding. In this section, we'll walk you through each step, taking extra measures to ensure that not only do you build a beautiful site, but you optimize it for the search engines in the process.
 Understanding Website Builders and Their Benefits
Website builders are a new ultimate invention of this fast world of digital pace. These are the platforms that allow you to design, personalize, and publish reliable websites without writing even a line of code. Such tools may comprise Microweber, which might have a range of customizable templates that could turn your website creation process into an easy project. The main value of such websites comes for their user-friendly interface, cost-effectiveness, and time-saving tools. Friendly drag-and-drop interface, hence making the platforms usable to all users aside from their expertise in the field of coding; cost-effectiveness, whereby such platforms offer free plans where one may have an option to upgrade as needed; and time-saving, whereby the ready-made templates would enable one to create sites in a matter of hours, allowing turning focus onto other marketing and financial duties.
How to Choose the Right Free Website Builder
First comes the decision of choosing the right website builder, which is the first step towards a successful website. Website builders vary in many aspects: each has something that will make you feel most comfortable. They all provide key features: SEO options, e-commerce variants, and responsive design. The platform relies a lot on its great flexibility in customization, which permits one to change and shift almost every part of your chosen template and layout design. This aspect goes in line with varied templates made available to suit your industry and to fit your aesthetic preference. The ease of use is something that should not be ignored because an intuitive interface is basic, and a drag-and-drop builder makes everything much easier. Proper customer support is the last piece of the success of any product. A successful website builder provides services and support for you, especially if you're a complete beginner. Then, it is good to have something on the back burner on matters that need a more knowledgeable look.
Microweber is an intuitive website builder that makes it easy for users to develop professional-looking websites. This newly established website platform excelled in each and every one of the key factors that make website builders the important tools they have become. It helps the Microweber user to build a unique and good-looking site with the least hassle.
Building Your Website: A Step-by-Step Guide with Microweber
Step 1: Sign Up for an Account
Start the journey of creating your personalized website by visiting Microweber.com. The first step is simple: Sign Up for Free. Click on the “Sign Up Now” button, which will take you to a registration form that only requires your email and phone number. Once you fill out all the required details, check your inbox for a confirmation email. While verifying your account isn’t strictly necessary, it’s a good idea to do so for a smoother experience. After verifying your account, log in to your new Microweber dashboard, where all the features await at the click of your mouse.
Step 2: Go to Your Website's Dashboard and Start a New Website
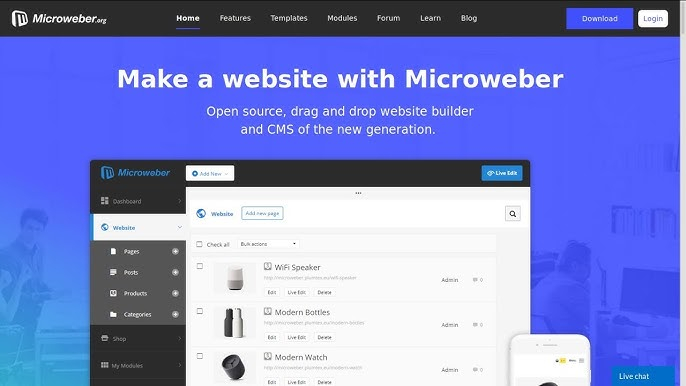
Once you have signed up and logged in, you will be directed to your website dashboard. This is your central hub, where you can manage all aspects of your website. To begin, look for the option to create a new website. Microweber’s interface is intuitive, and all you have to do is click on “Start New Site,” and the platform will guide you through the initial setup process, ensuring you don’t feel lost at any stage.
Step 3: Choose a Template for Your Website that Fits Your Brand
Now, one of the cool features that Microweber offers is the diversity of the collected templates, targeting different styles and industries. So whether you're envisioning your sleek business site, vibrant portfolio, or engaging blog, you will find a suitable design for you. Take your time to browse through the options and, upon finding one that resonates with your vision, select it to preview every aspect. A good template is the skeleton of your site, so choose one that represents your brand the best. Once you're happy with a choice, click "Start With This Template" to get rolling. Remember that at any time, you can make changes to the template in order to fit your needs more precisely.
Step 4: Customize Your Website Design
The creative part is to edit the content of your website. In Microweber, editing of content is relatively easy since all elements can be added and moved using its drag-and-drop interface. You can easily insert text, images, videos, and even galleries. Need a contact form? Drag the contact module onto your page.
You can also utilize the Google Maps module by dragging and dropping it where you would like on your site. Within the Microweber platform, everything is handy. On the dashboard, there's a clean layout where you can navigate to other tools and settings without much effort. You can operate your site's pages, design elements, and modules from the left-hand menu, where everything is clear and titled.
Step 5: Add Essential Content to Your Website
Once the template is selected, this is a good time to get into the setup stage. Here, define the crucial parts of your website, among other elementary settings. Take your time and fill in texts, images, videos, Google Maps, and whatever you may want, since this is relevant both from the perspective of the user experience and for SEO. The wizard will walk you through and prevent you from forgetting some of the key steps. This is the most basic work you will be doing to create your online presence.
Step 6: Optimize for Mobile Responsiveness
Your website should shine on each device. From desktops to tablets and smartphones, responsive design options in Microweber can make your website morph fluidly into any screen size. That means your website looks amazing and cohesive on all the platforms. A seamless experience is a must for modern users who increasingly access websites while on-the-go. The smart design technology operating within Microweber works seamlessly to adjust your design to all interfaces. Each button, media, or content will move to give room for fitting on the screen. It keeps it easy to browse and will sustain your customers. The responsiveness not only adds to the grades of customer satisfaction but also enhances credibility in doing business, hence creating a very strong foundation for success in the market.
Step 7: Configure SEO Settings for Visibility
Give exposure to your website and make it search engine-friendly. Microweber is set up with search engine optimization within it. You can set a meta description, make it as captivating as you would like, and then add it to every single piece of your content. And such an easy adjustment will help search engines understand what's on your site and drive more traffic. It gets so easy with Microweber guiding you step by step through the process and making SEO the easy strong point in your strategy when it comes to website growth.
Step 8: Publish Your Website and Go Live
Once your website is fully optimized and ready, publishing it is simple with Microweber. Just navigate to the "Publish" option in your dashboard and click to make your site live instantly. Microweber’s platform provides secure, fast, and reliable hosting, ensuring smooth access for your visitors. Before you publish, take a moment to review all pages, links, and media to ensure everything displays perfectly. After going live, you can continue making updates and improvements through your dashboard, keeping your content fresh and engaging for your audience.
Step 9: Connect Your Own Domain
A custom domain enhances your site’s professionalism and establishes a wider presence online, which is why Microweber allows you to link a custom domain. If you don’t already have a domain of your own, you can easily purchase one. In your dashboard, navigate to the domain settings and follow the instructions to set it up. This is a vital step for branding and making your site more memorable.
Step 10: Share Your Website with the World
Congratulations! Your site is now live. The last thing you want to do is to let your audience know about it. Let the world know about your site through social media channels, email newsletters, and all other favorite marketing methods you use. The larger the interaction with your audience, the greater the flow of traffic to your site and community building for your brand will be.
Exploring Additional Features for Future Enhancements
Microweber accompanies you with each of your steps and after them. With Microweber, while the website grows, one should feel comfortable relying on its features to support such growth and contribute to further success: e-commerce functionality to sell products right from the site, analytics for monitoring the behavior and engagement of customers, even a more professional custom domain to give strength to your brand.
Conclusion: Start Your Website Journey Today
Creating a website with Microweber is not just a technical process; it is about self-expression or the expression of your brand online. Provided that you carefully follow these steps, this should result in a professional online presence to suit your needs, reach your desired target audience, and showcase your unique vision. Now, roll up those sleeves and bring those ideas into life — Happy building!
FAQs
Can You Build a Professional Website Without Coding?
The short answer is yes. A number of powerful website makers would provide an easy way to design and publish a professionally-looking website. You will be able to create a good-looking, functional website to house the identity of your brand in only a few clicks by using an intuitive editor and customizable templates.
Are free website builders reliable for long-term use?
Free website makers are good for a startup, but the more your website develops, the more advanced features and further flexibility will be needed-which means upgrading to a paid plan will become necessary.
Can I switch from a free plan to a paid plan later?
If you want, you can have a free plan at the very beginning, cruise in on the free templates, and make a website that best fits your needs at that moment. Afterward, as your needs get greater and greater, you may upgrade your current website plans to any higher grades.
What are No-Code Web Builder Tools?
No-code web builders are specific tools that allow the users to create web pages without annoying codes and any technical knowledge or coding. You can drag and drop tools and edit your selected template according to your will.
Should you use a free website builder?
Free website makers are good for starters, since they include all the essential elements that can allow you to establish a basic presence online, where you find several customization options and upgrade when or if needed.

