Creating an Online Store with Microweber CMS: From Setup to Sales
Posted on: November 14, 2024 Updated on: November 25, 2024 by Nada AllamE-commerce has revolutionized the way businesses operate and reach their customers. As a matter of fact, online presence has become essential for any business to grow.
This way, all-sized businesses can market their products all over the world for the convenience and accessibility of all customers. Entrepreneurs and other businesses that want to get into electronic commerce must choose a friendly and efficient platform that can help them launch their websites.
Microweber is an open-source content management system that tackles the needs of users in building websites even though these persons have no technical and coding backgrounds.
For that reason, with Microweber, creating and maintaining an online store is easy because it already carries within itself e-commerce integration, which will help create the store and optimize the products.
Benefits of Using Microweber CMS for E-commerce
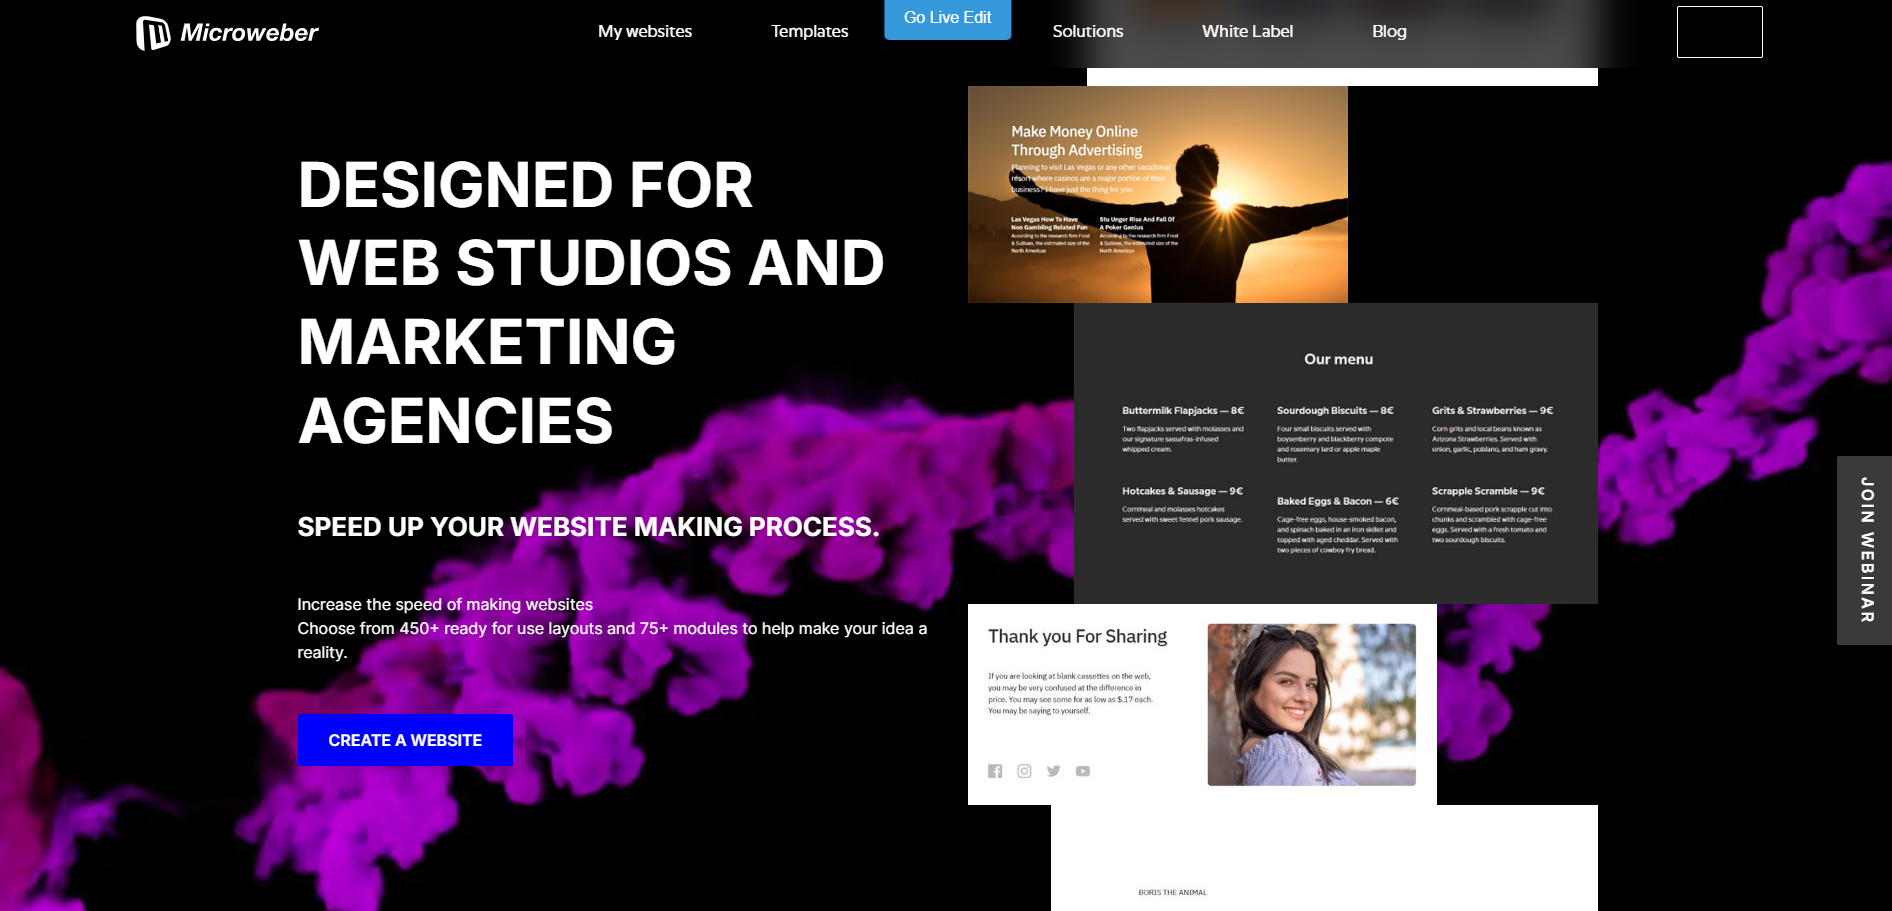 E-commerce businesses require tools that would facilitate operations without compromising on functionality or quality. Microweber, in particular, is a CMS targeted at offering a user-friendly platform that's packed with essential features needed to manage an online store.
The intuitive design options, powerful e-commerce functionality, and SEO capabilities of the platform would, therefore, have a better impact on the entrepreneurs by creating, customizing, and optimizing their stores with further management therein with much ease at a very low cost.
Among the many unique and expansive features of Microweber, business owners can begin to grow an online presence, using the following features:
Ease of Use and Accessibility
Microweber provides an intuitive drag-and-drop interface, making it accessible to novice and expert designers alike. This simplicity ensures that anyone can build a functional and visually appealing online store without the need for coding.
Built-in E-commerce features
Microweber includes all the essential e-commerce features, including product listings, prices, and inventory tracking and management. These built-in features streamline the process of managing an online store, making it convenient for individuals and small businesses in particular.
Cost-effectiveness
Microweber is a free CMS, which makes it a budget-friendly option for startups and small businesses. The platform’s open-source nature relieves users from the need for extensive technical support and allows them to focus on their business.
SEO and Marketing Tools
Microweber integrates SEO and marketing features, which help online stores reach their target audience. Using customizable meta tags, URLs, and blogging, the platform arms store owners with the power to optimize their sites toward search engines for better outreach to customers.
Step-by-Step Guide to Launching a Store on Microweber
Setting up an online store with Microweber CMS is easy and grants the users full control over how their stores look, feel, and behave.
The guide will walk the user through everything from setting up the basic store page and organizing product listings to search engine optimization, in order to establish a fully effective store that would appeal to customers.
The following steps will enable any user to create a professional-looking e-commerce website and customize it to attract and engage with their target audience.
Setting Up the Store Page
1. Signing Up on Microweber
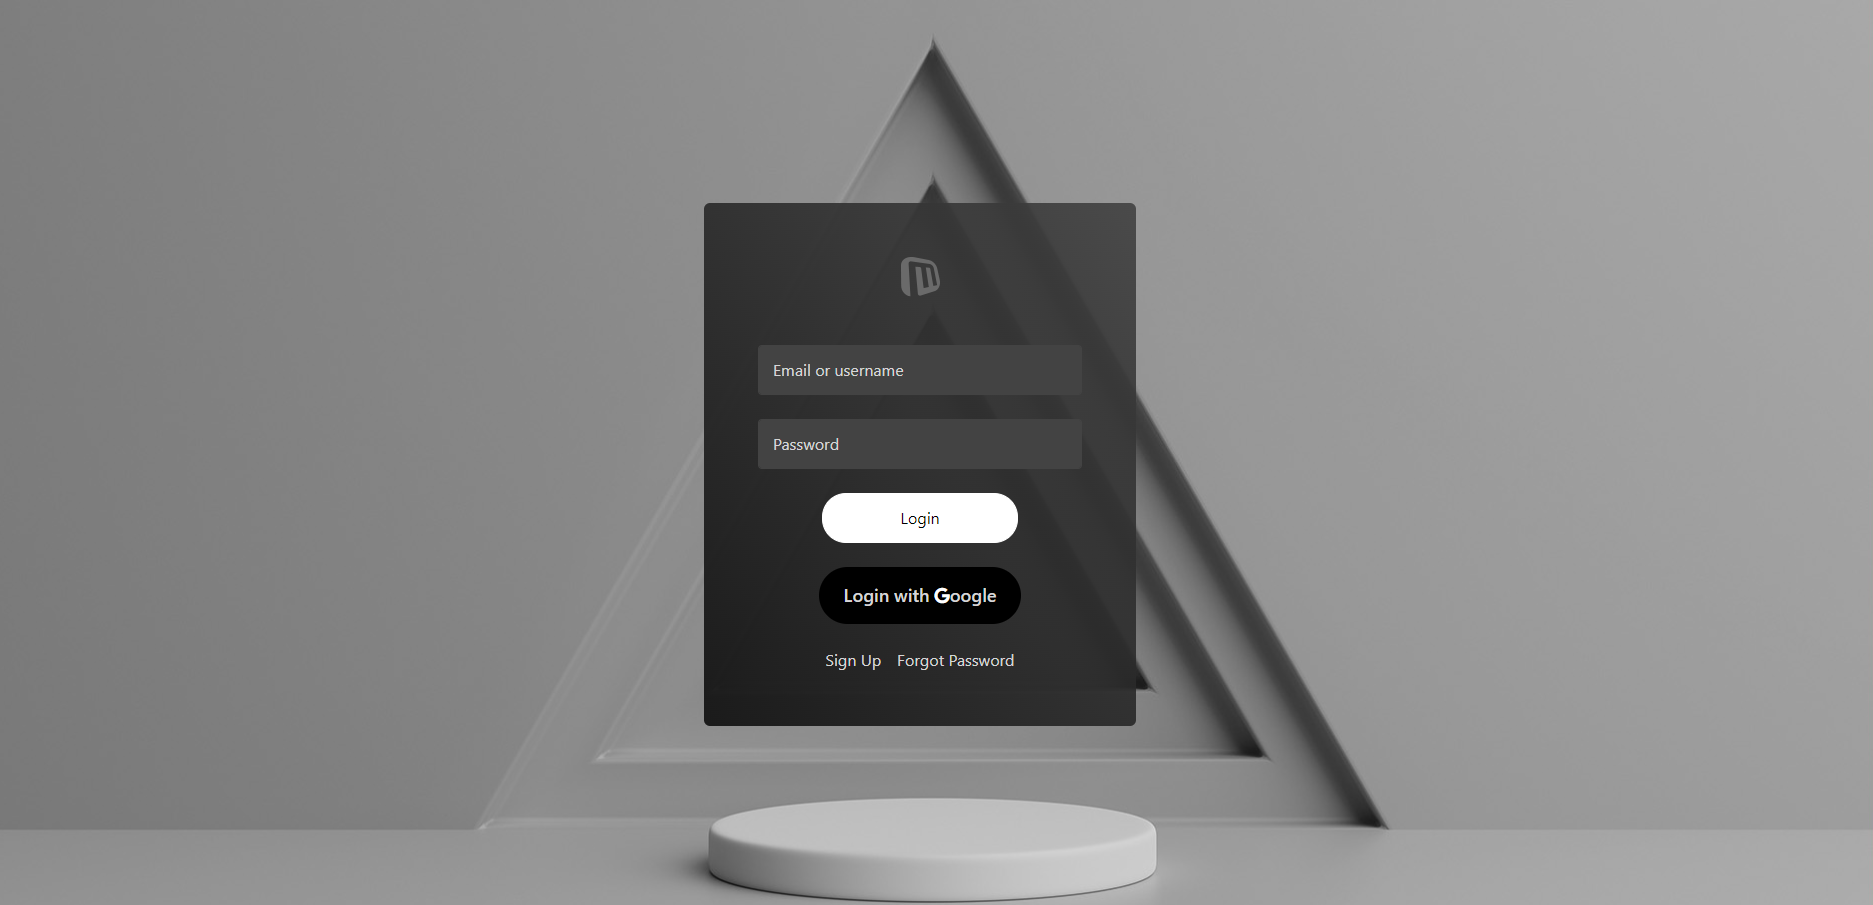 First of all, you can begin by setting up your online store. You’ll need to sign up for a Microweber account.
Head to Microweber Website and click on the ‘Log In’ button, which will lead you to a page that allows you to either log in or sign up and create your account.
First of all, before you start designing your online store, you should register your account on Microweber. You can find this in the header of the Microweber website and click the "Sign Up" action to create your account. Having registered your account, log into the dashboard and create the store.
2. Choosing a Template
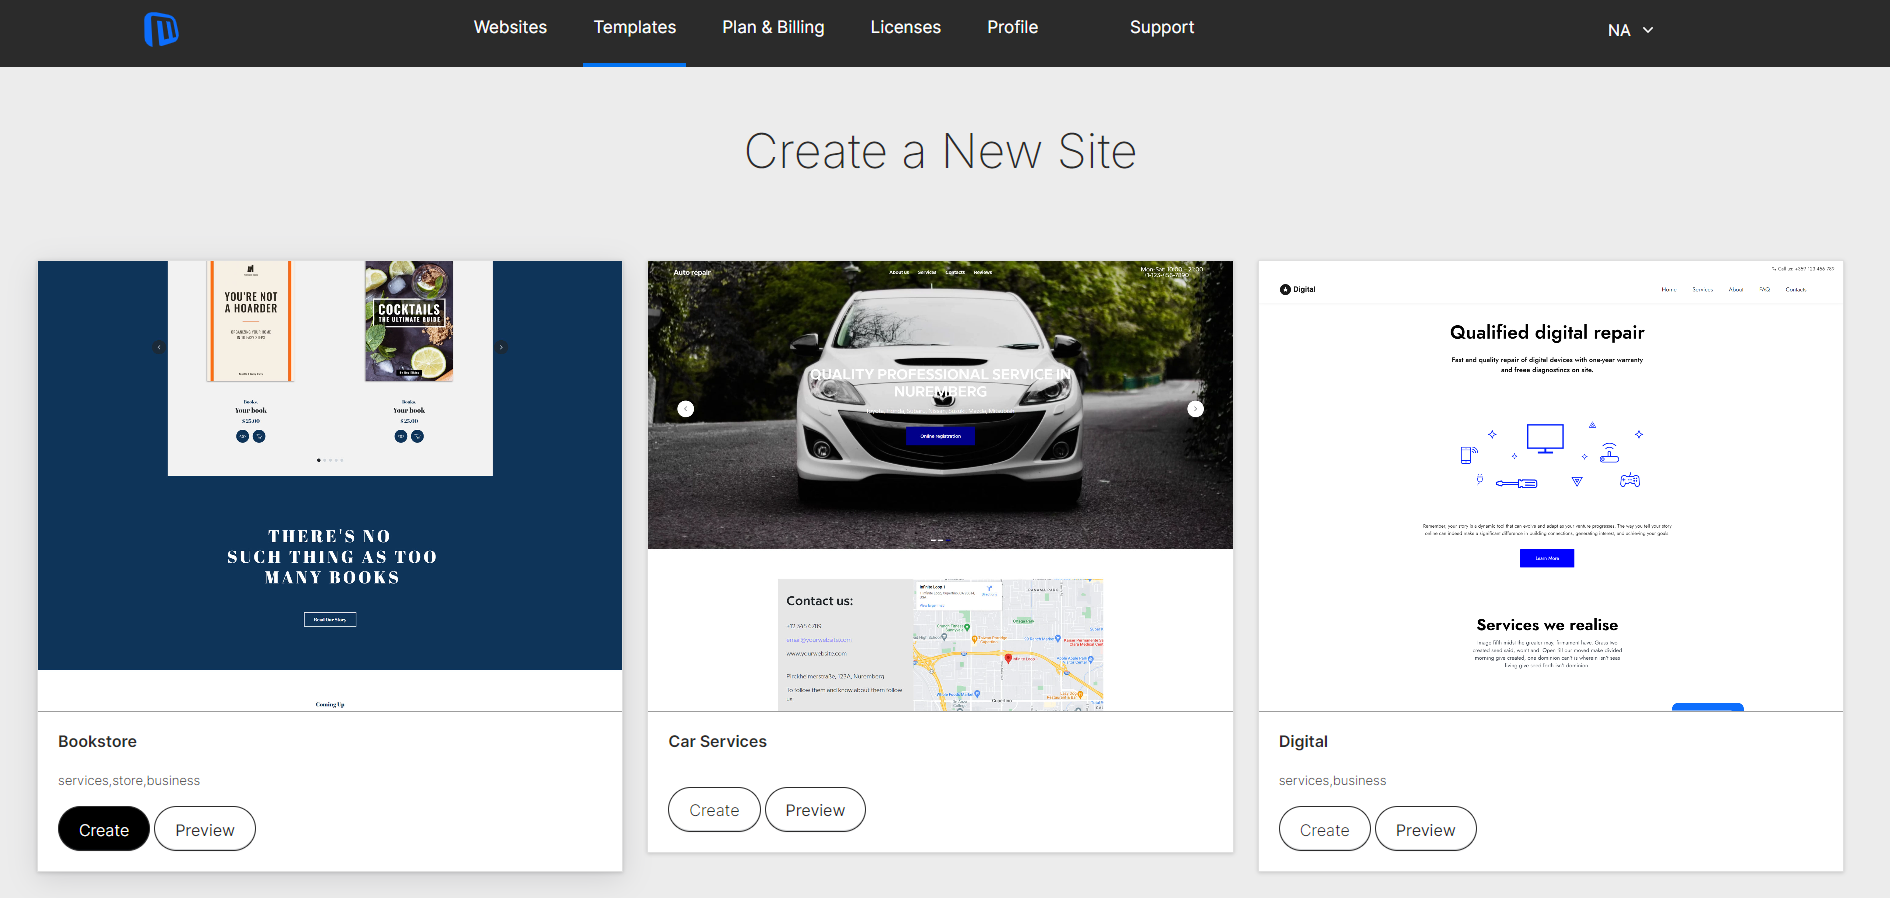 Once registered, you can log into your dashboard and begin your store creation process by selecting a fitting template.
Microweber offers a wide array of e-commerce templates, designed to align with various businesses’ types and styles.
A template should align with your brand’s aesthetics and identity. If you prefer a more personalized layout, you can utilize the drag-and-drop editor to design a store layout that showcases your vision.
Microweber allows you to preview multiple templates, and once you've chosen one that fits your vision, click on ‘Create Website’ to head on your website creation journey.
3. Name the Store
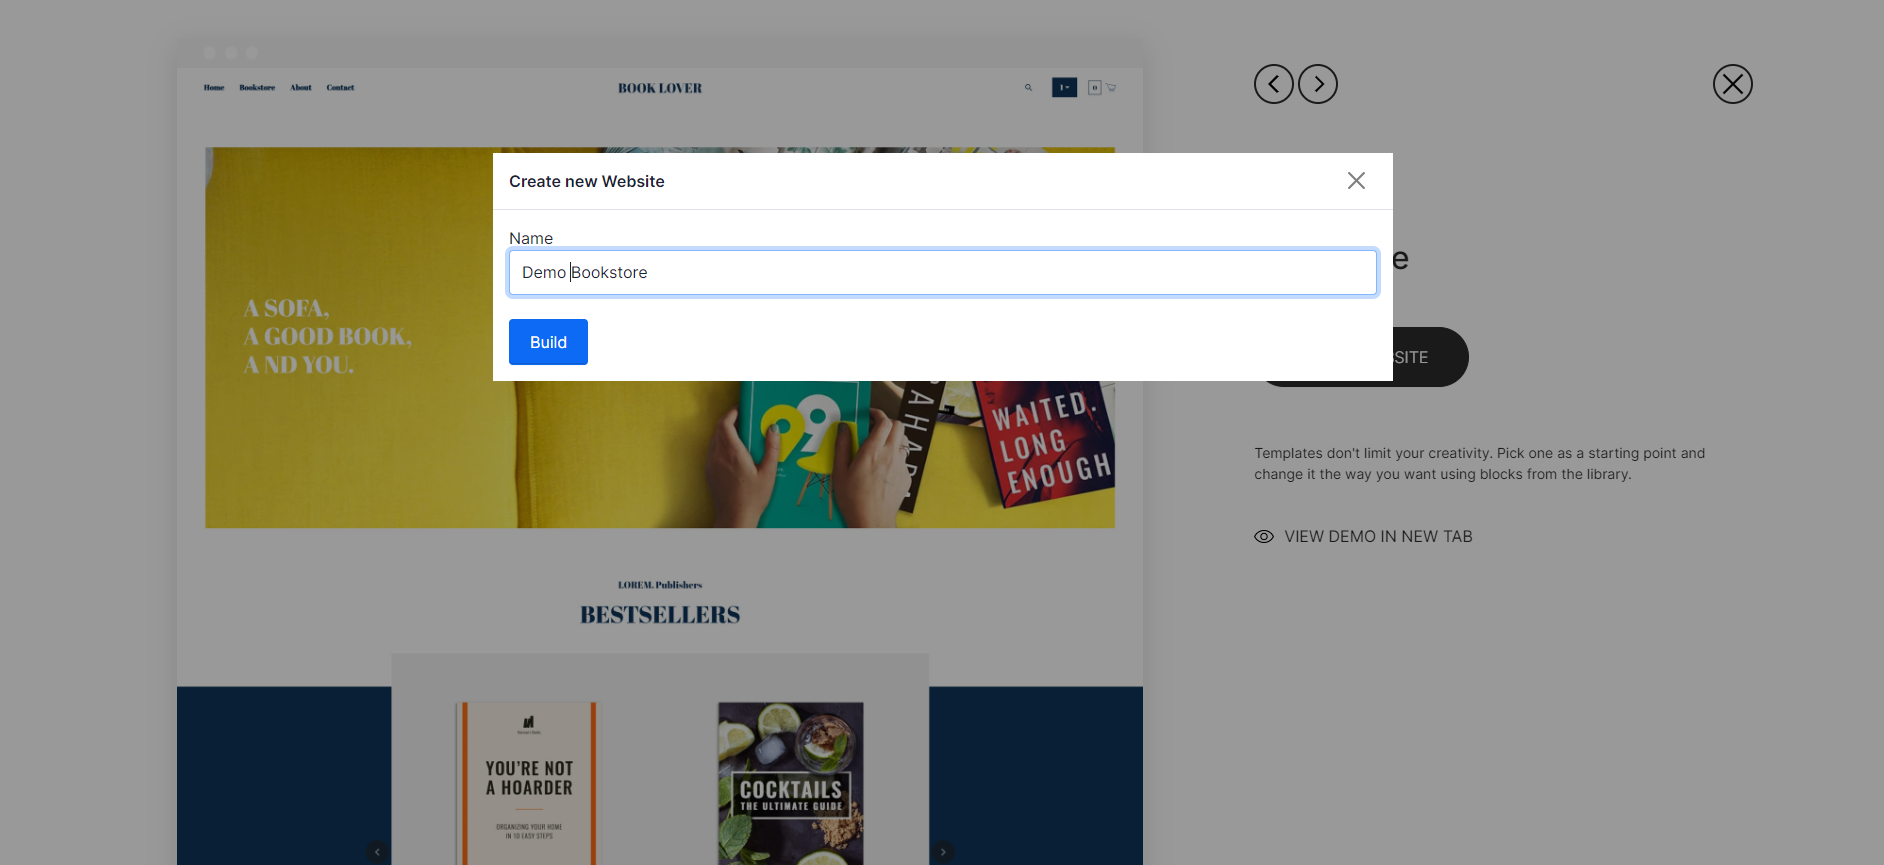 A store’s name showcases its identity. A catchy and memorable name directly relates to your products and attracts potential customers. Keep in mind that the store’s name should be easy to remember, spell, and search for online.
Now that you've chosen your store's name, click on 'Build' and wait for your website to come to life.
4. Creating a New Page
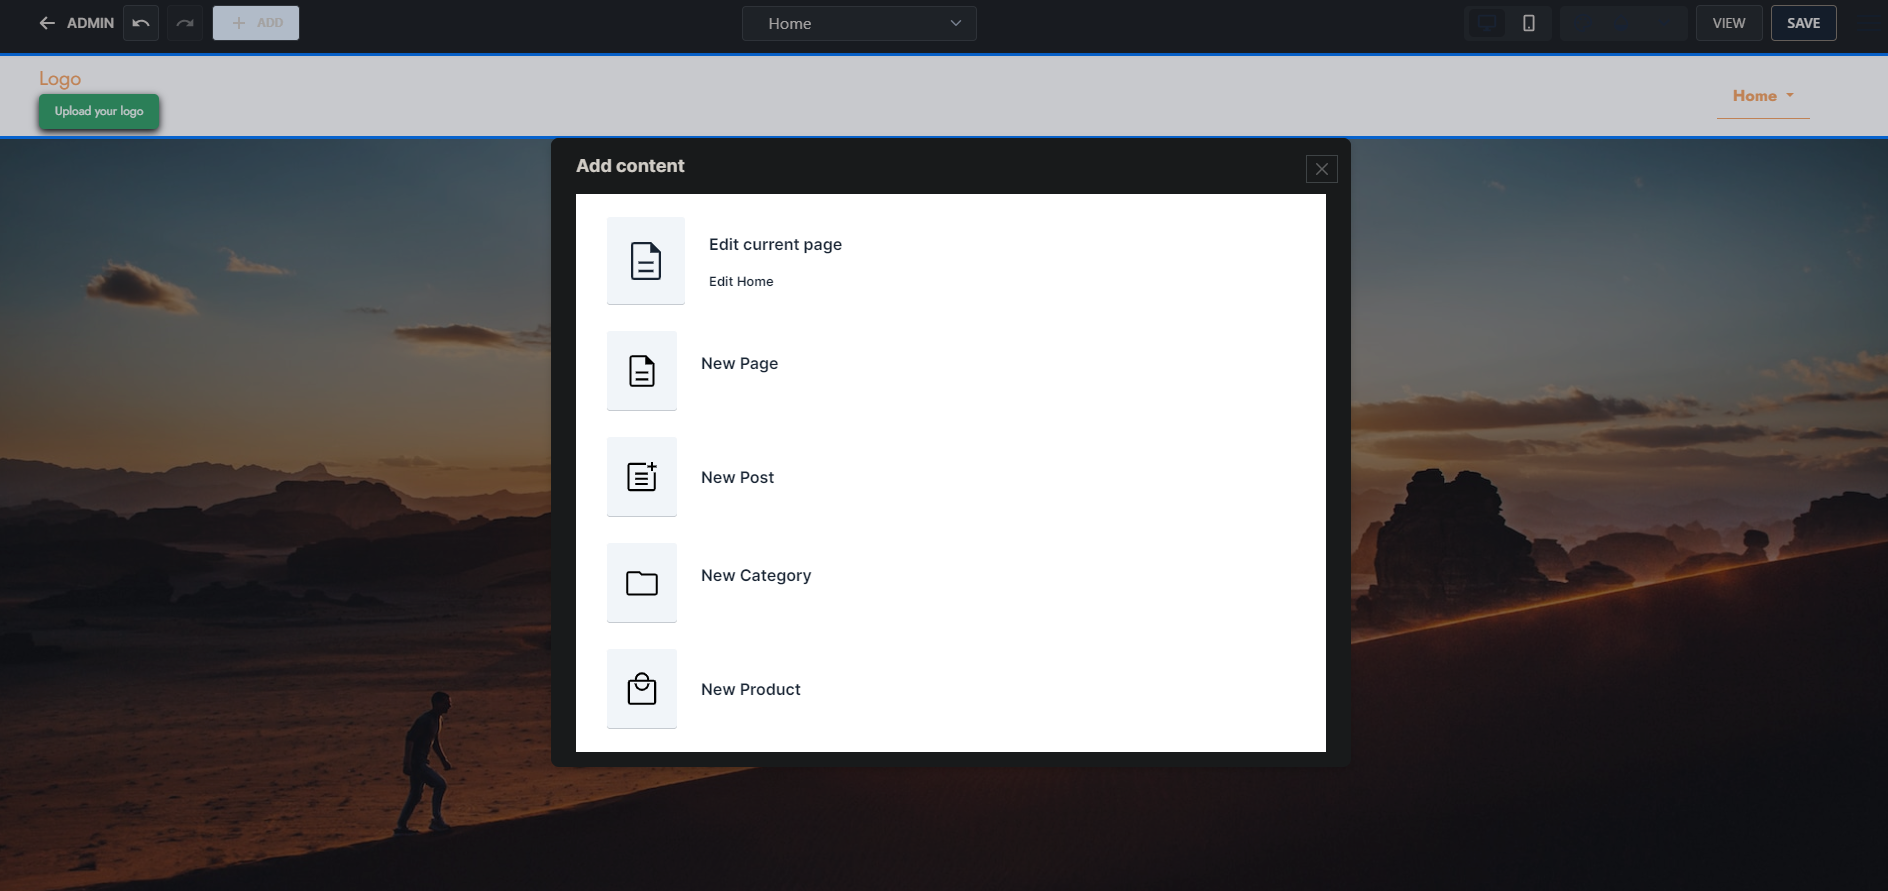 Once you have chosen a template and adjusted the ‘Home Page’ layout, you can navigate to the Pages sections and click on ‘+ ADD’. This button will enable you to create a new page.
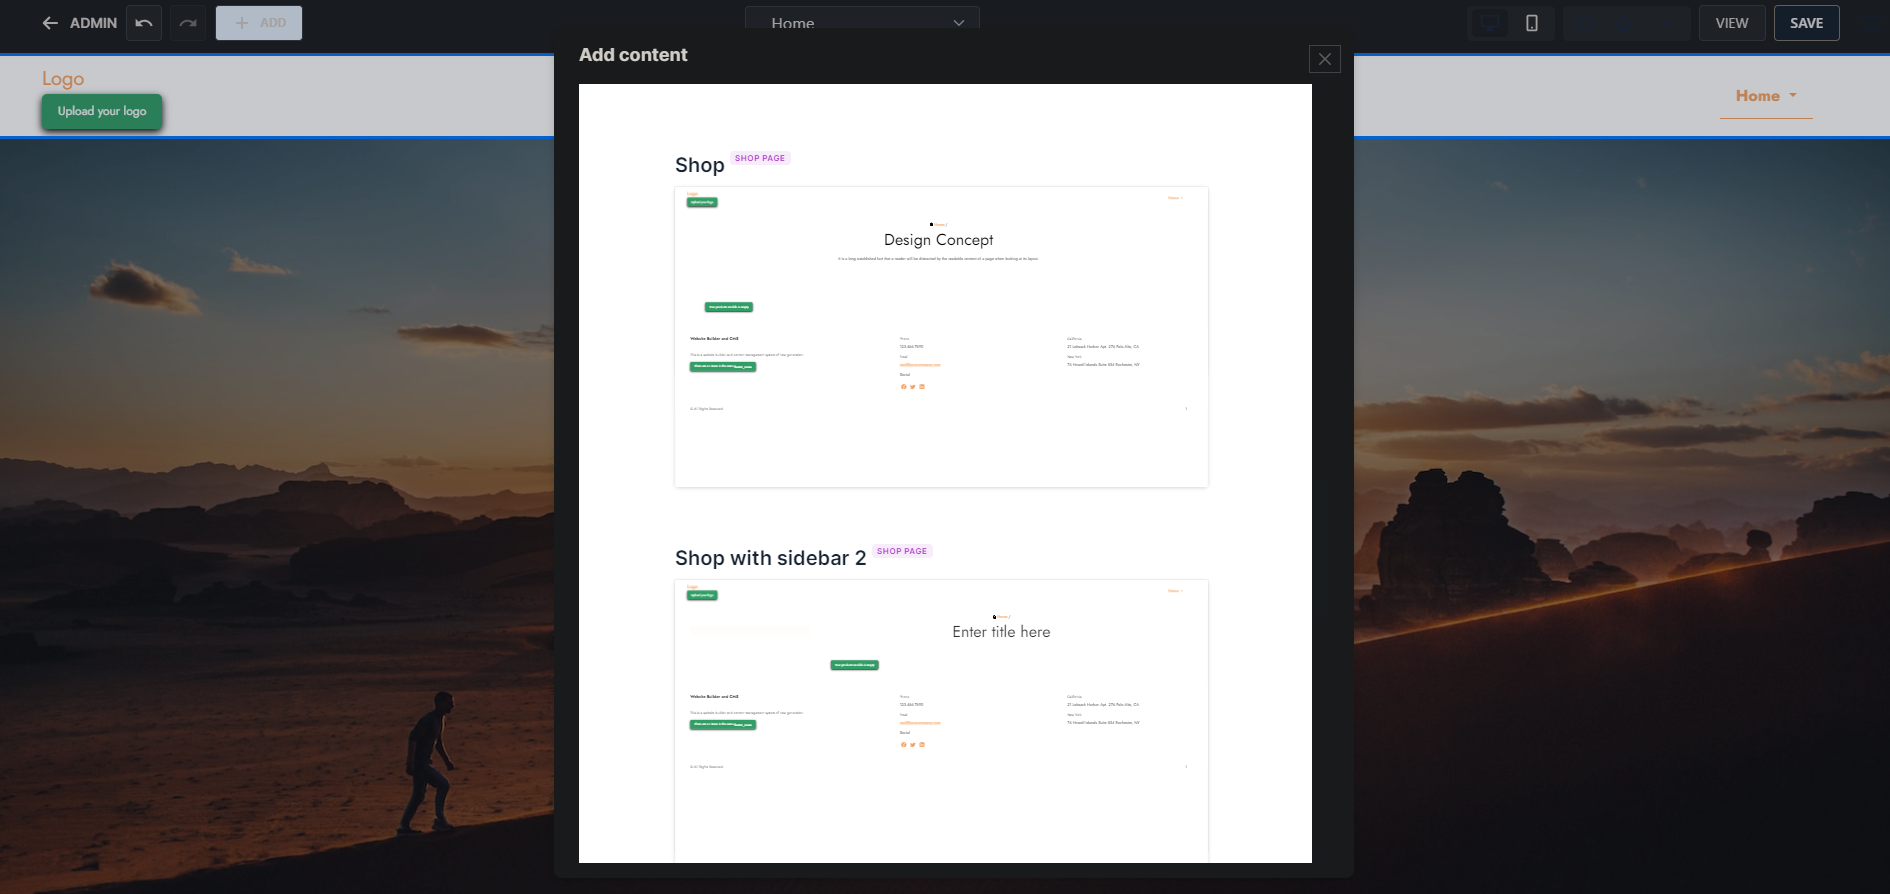
Then you can select the ‘Shop’ page type and start building your e-commerce page. This step ensures that the page’s layout is optimized to showcase products, handle transactions, and create a seamless shopping experience for your customers.
 Adding Products to the Store
1. Accessing Product Management
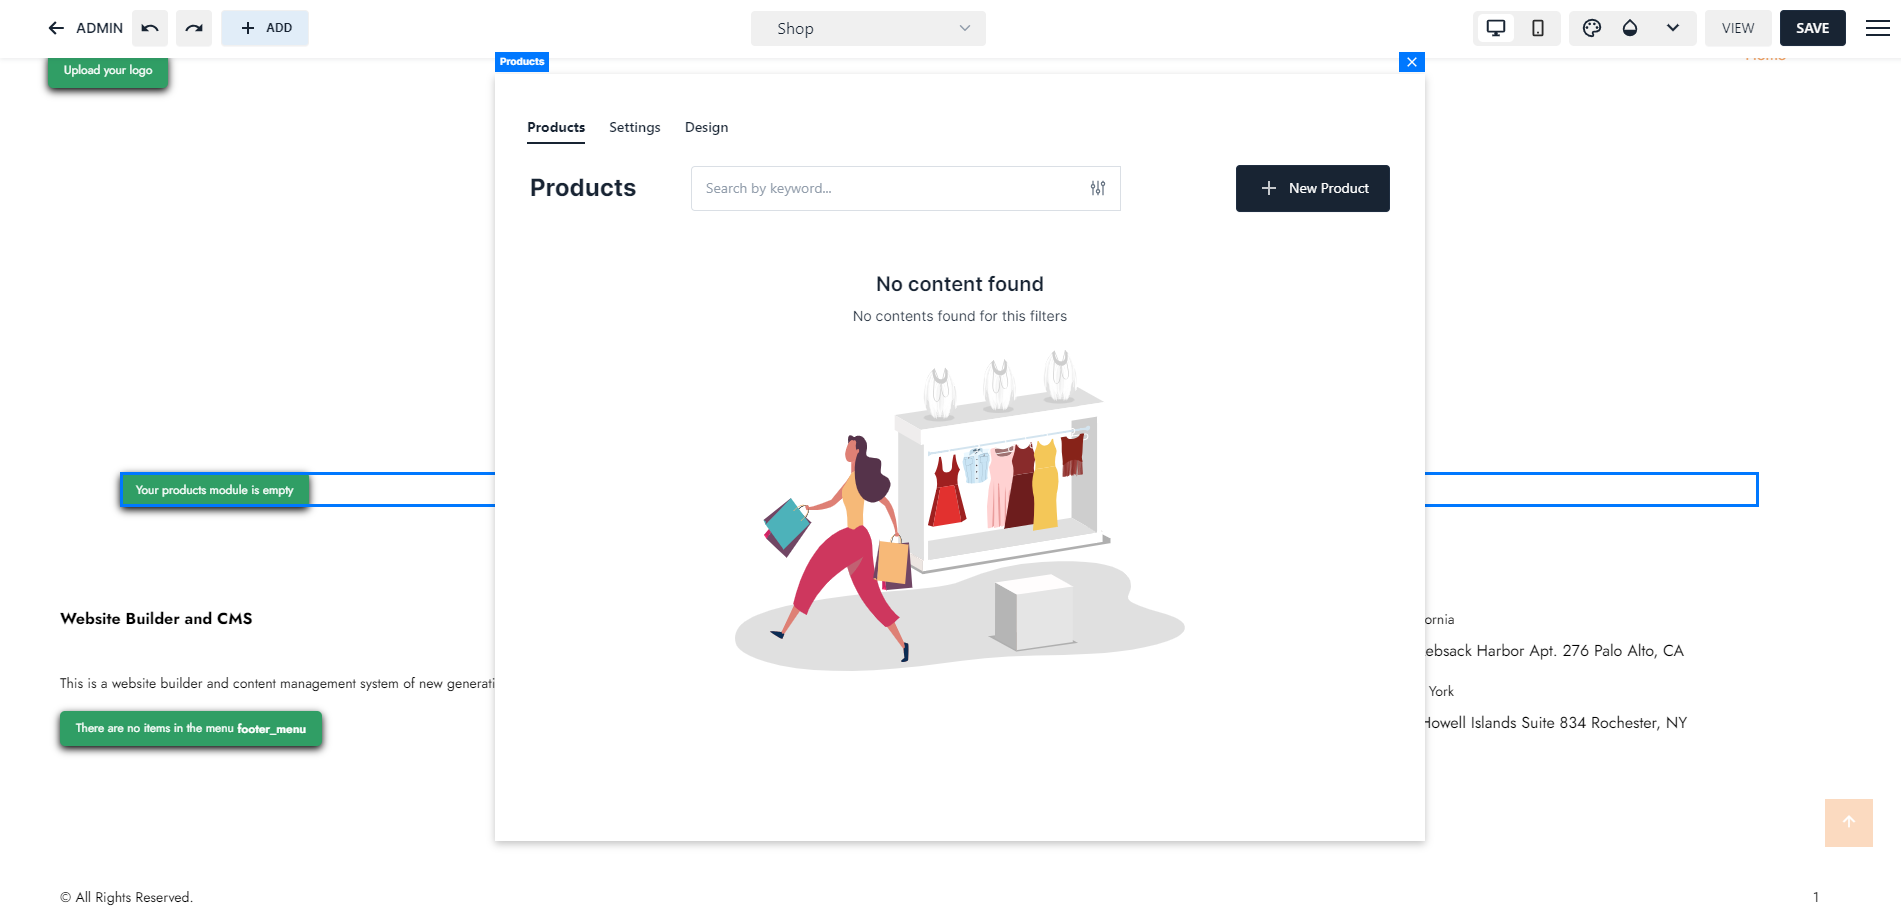
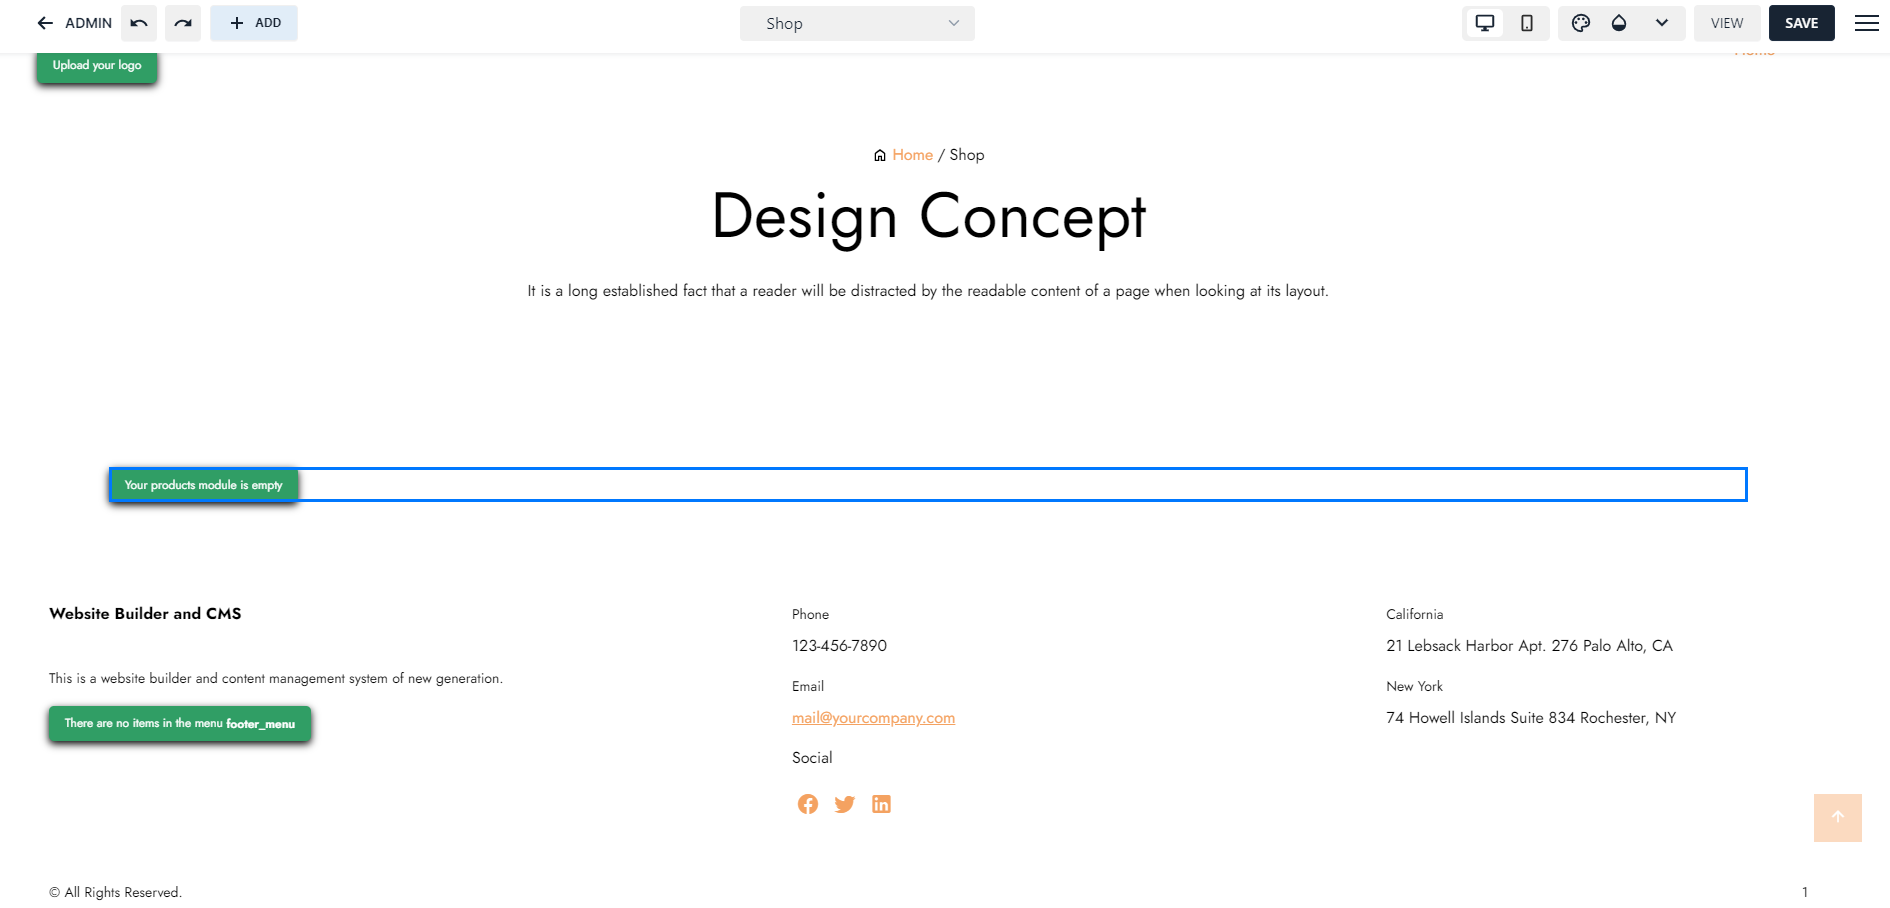 In the dashboard, go to Store Page, press on ‘Settings' icon. This will add a new product widget to your layout. Then, you can click on Settings and choose ‘+ New Product’.
 2. Adding Product Details
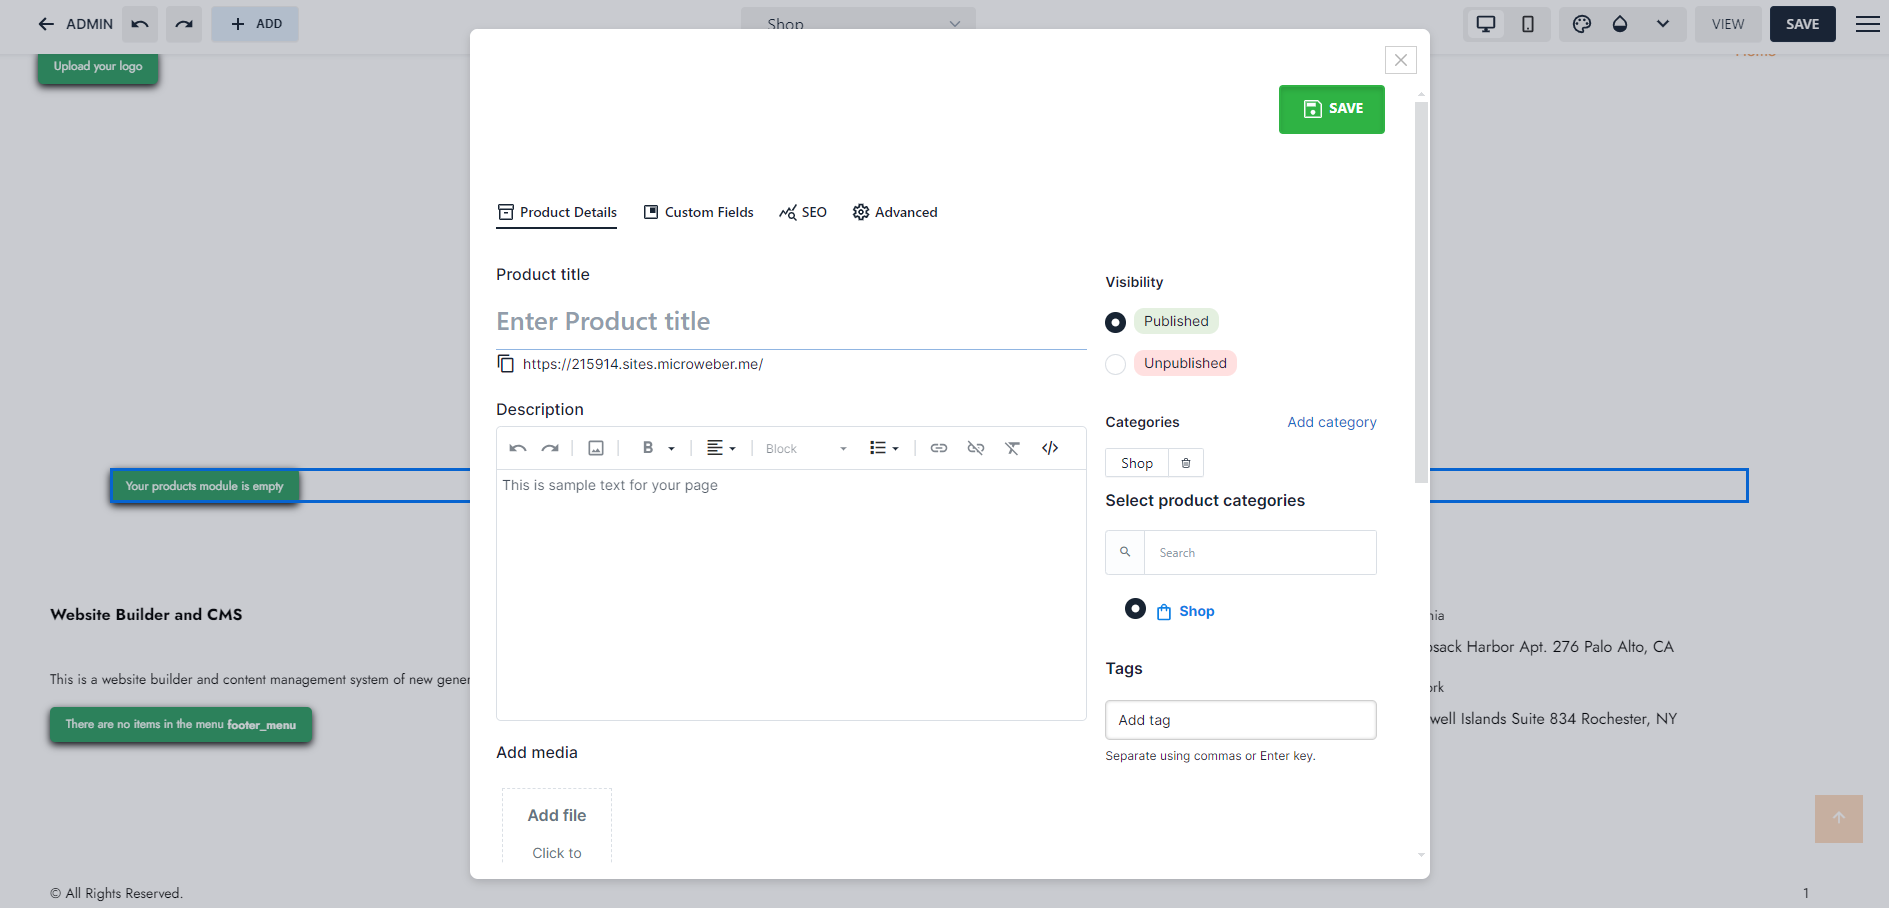 Title: Use clear product titles that are easy for customers to understand and search for in the search engines.
Descriptions: Informative and appealing descriptions highlight the key features and benefits of each product and help in gaining credibility.
Image: High-quality images are essential for any online store. You can upload multiple images to give your customers a complete view of the product.
Categories and Tags: Each product can be assigned to relevant categories and tags, which makes it easier for customers to navigate and find your products.
Adjusting Product Listings and Pricing
1. Setting Prices and Discounts
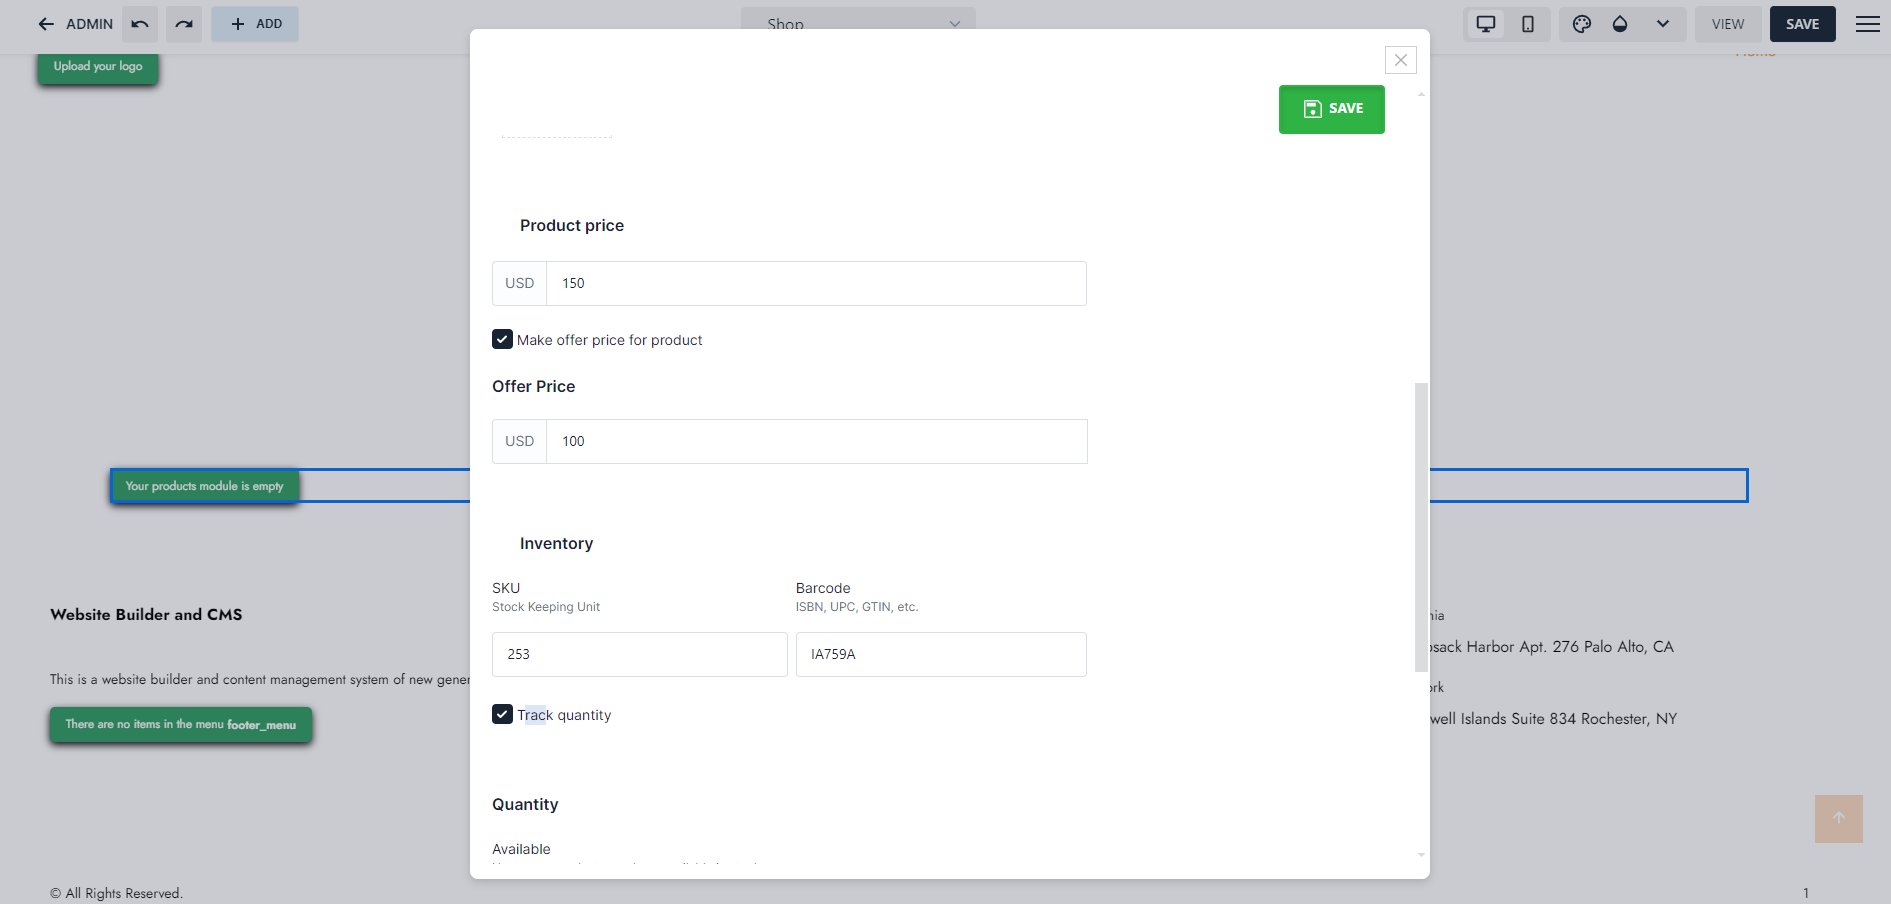 In the product editor tab, you can enter the price of the product. You can also set a discounted price, and manage the discount time frame if you wish to offer promotions.
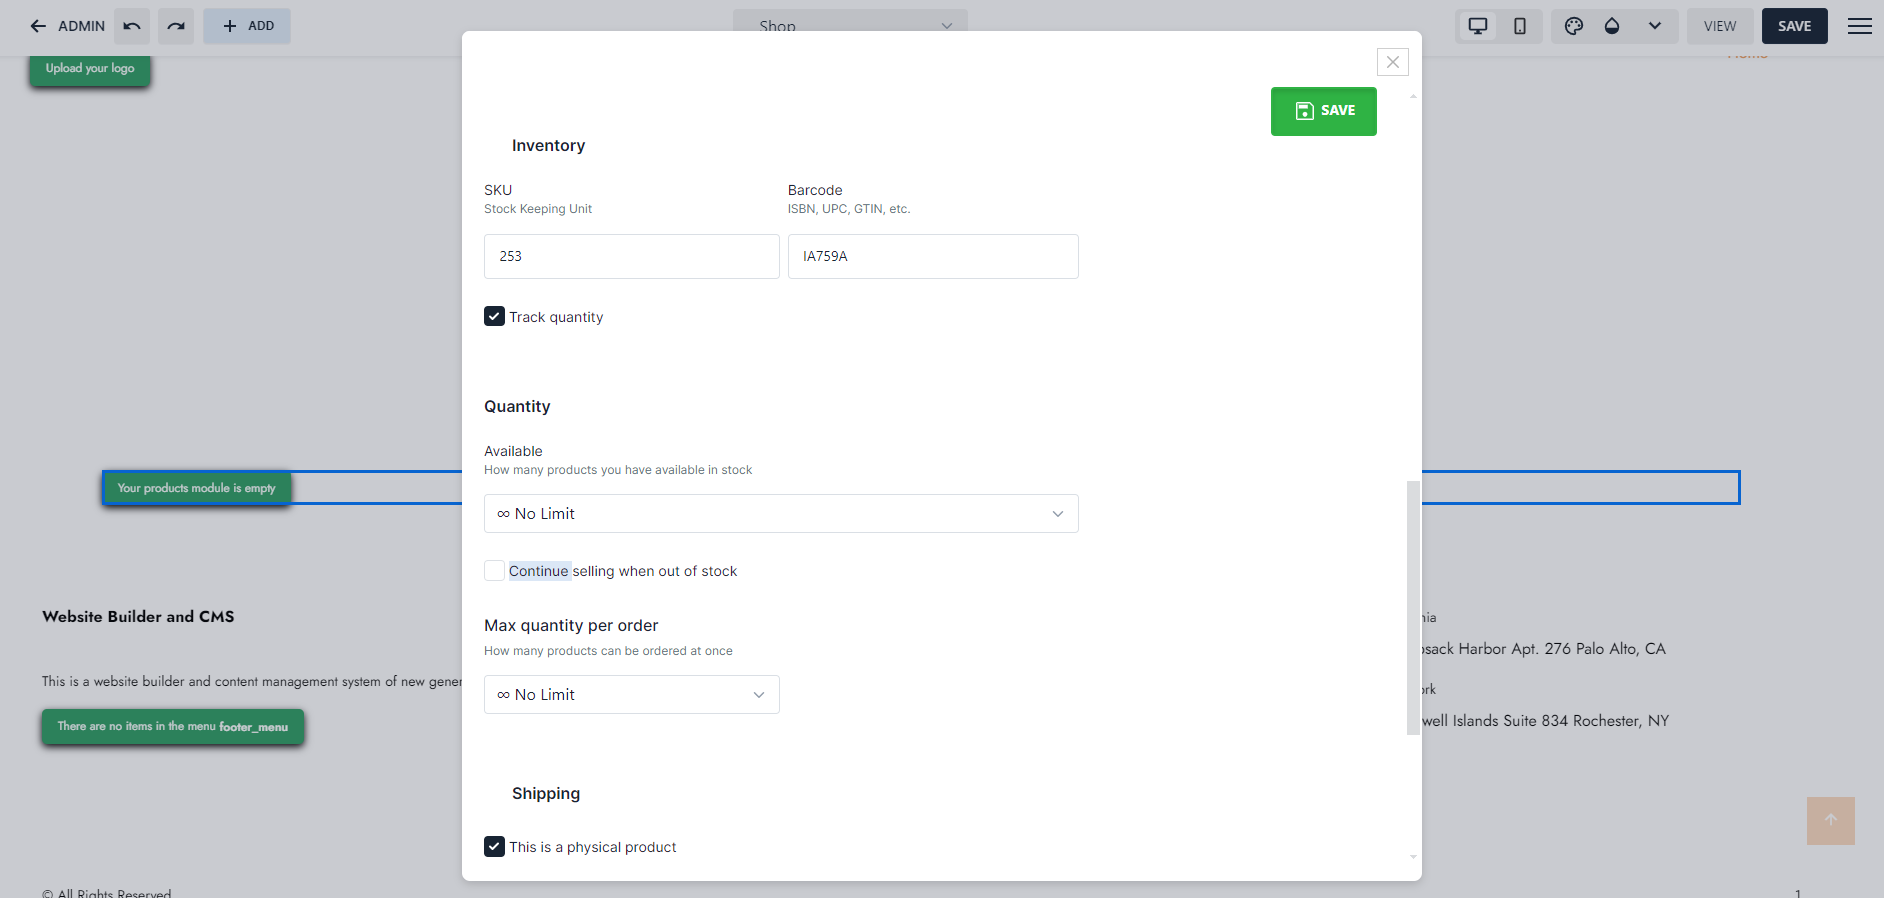 In the Product Editor, you can manage stock levels and track inventory automatically, which ensures that you don’t oversell or run out of stock.
Set the product quantity, and enable automatic stock management to keep your records accurate.
You can also manage the maximum number of items that can be added to one cart.
3. Product Arrangement
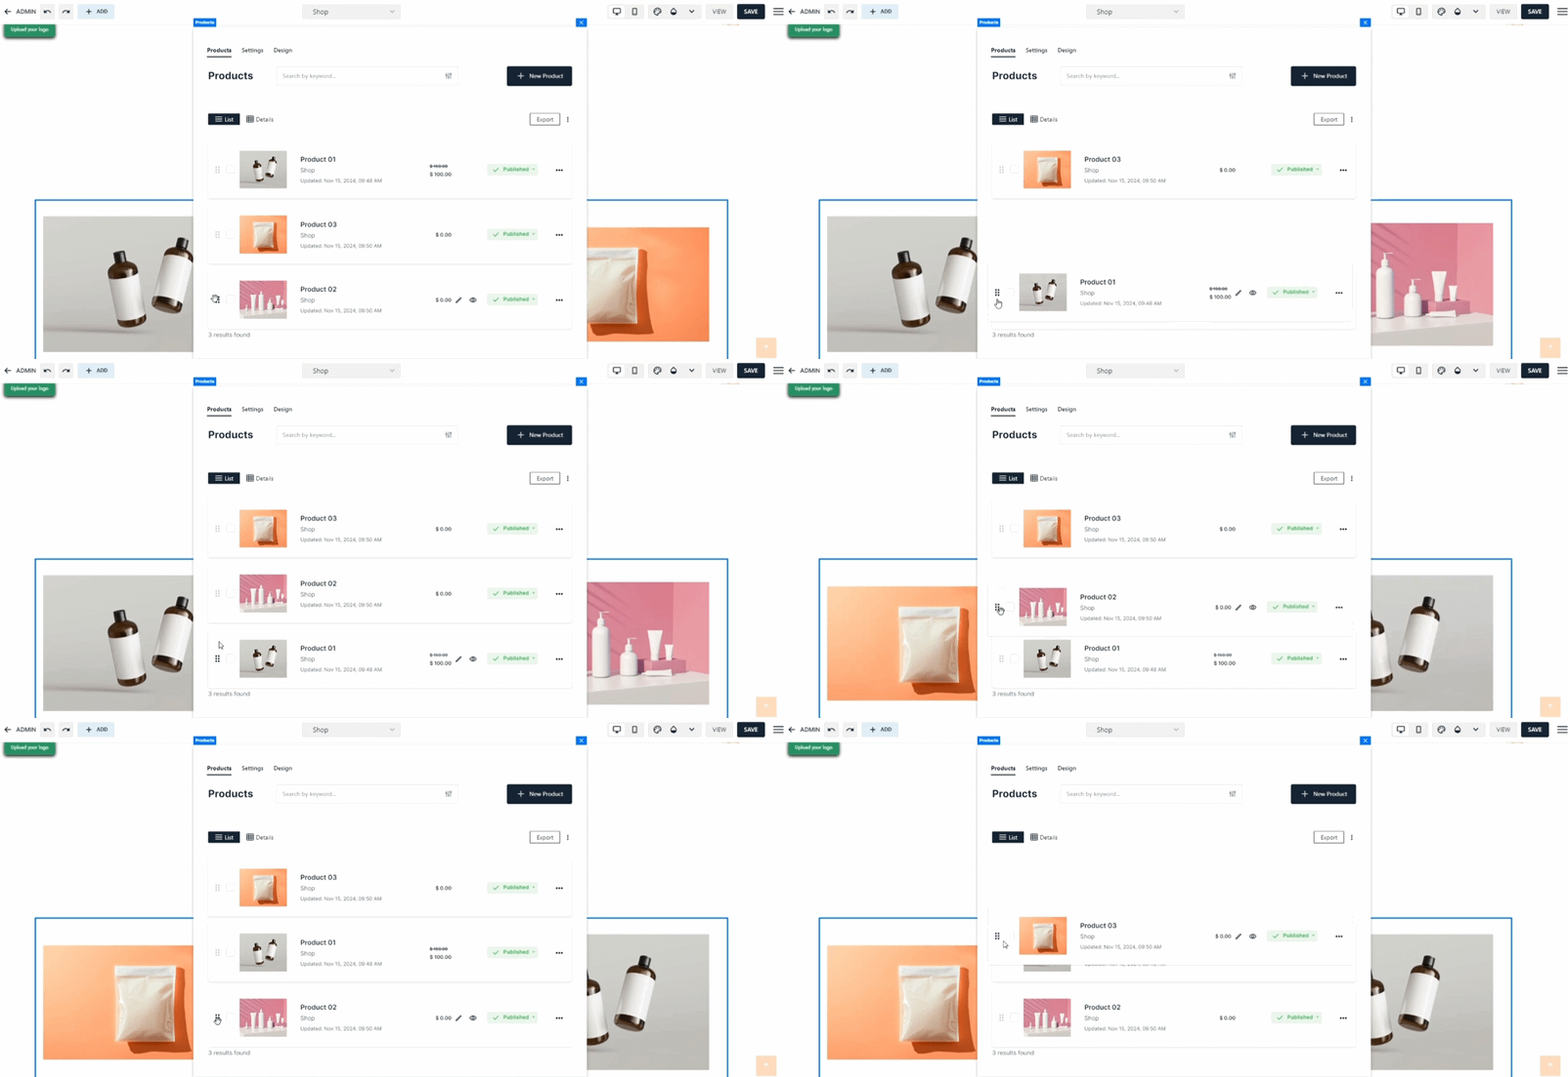 Organize your products in a way that enhances the customer’s shopping experience. Group similar products, categorize them, add tabs for new arrivals, and arrange your listings to create a seamless and enjoyable browsing experience.
Store Optimization for SEO
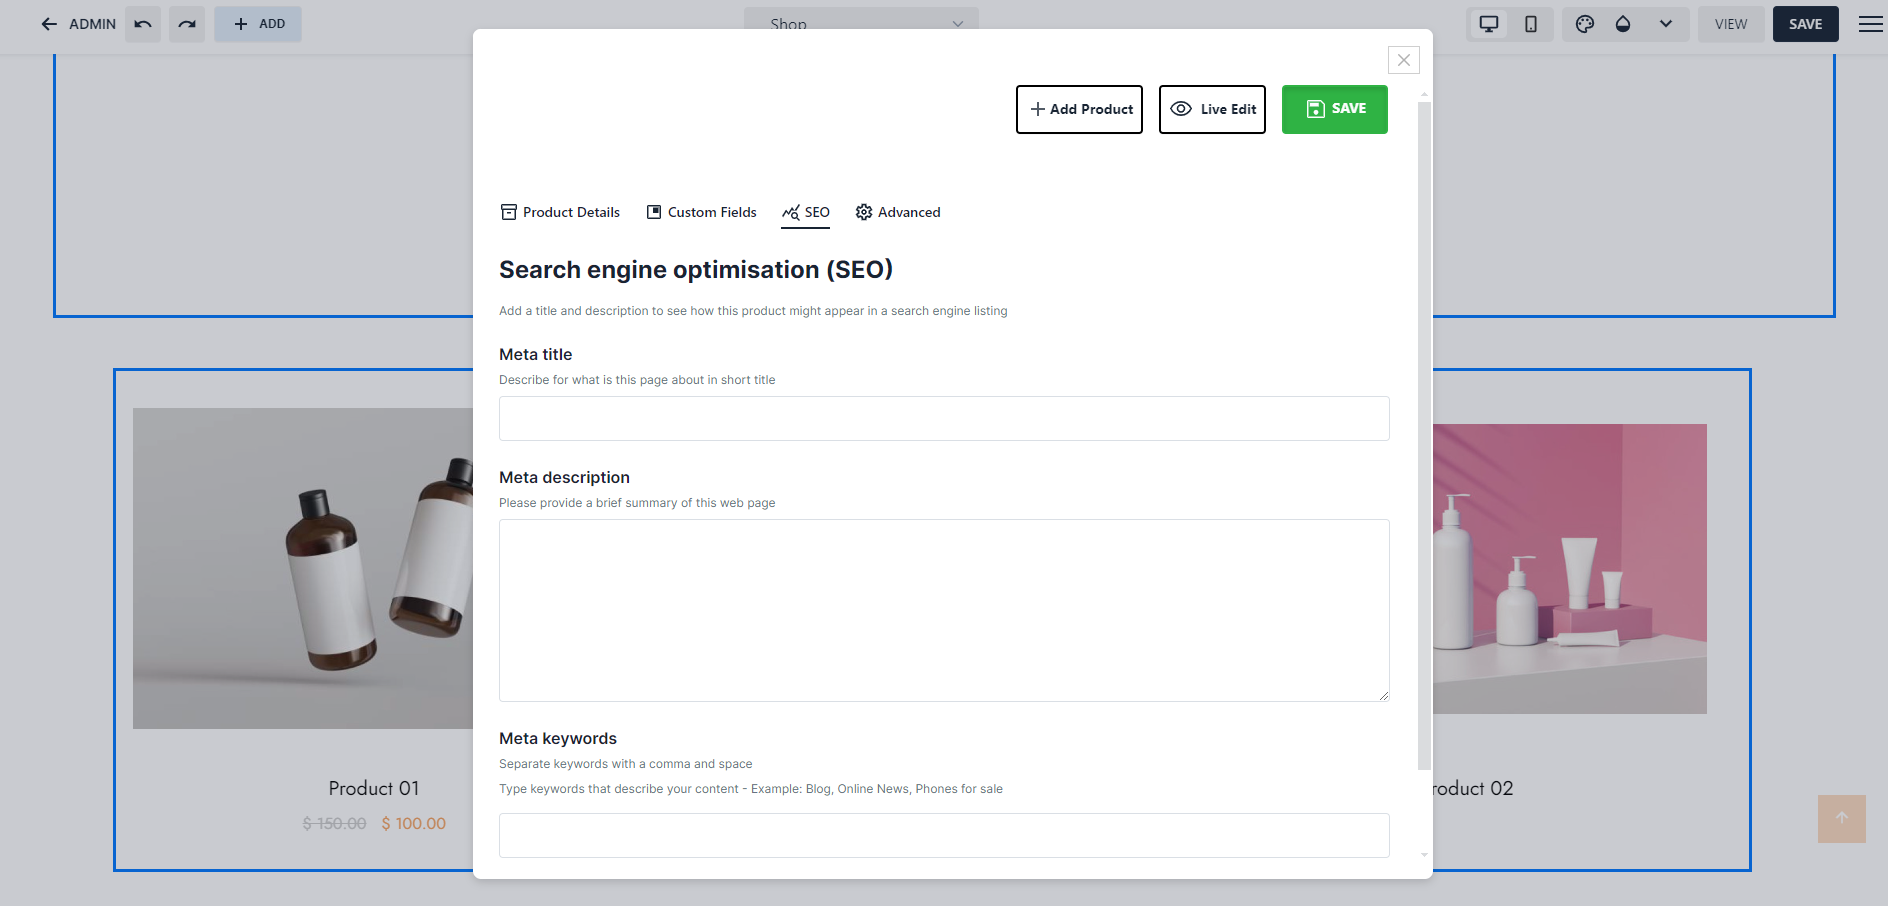 SEO optimization is paramount for the success of any online store, as it enhances products’ visibility in the search engines. Through simple emphasis on key SEO strategies, your store can reach a wider customer base, and gain more organic traffic.
Proper optimization doesn’t require refining product images and descriptions alone, but also enhancing technical elements such as meta tags. This will help search engines contextualize your content better, and aid your store in gaining more exposure.
Products Meta Tags
1. Meta Titles:
Each product can include its own metal title. A strong title is one that clearly describes the product by incorporating the most vital keywords that customers might use in the search engine.
This improves search engine visibility and encourages hits on the website.
2. Meta Descriptions:
A compelling meta description (about 150-160 characters) should summarize the product’s key features, uses, and benefits. A well-written description boosts SEO and entices potential customers as they navigate through product listings in the search engine.
3. Meta Keywords:
Relevant keywords that accurately represent the product would aid in gaining organic traffic. Keywords should align with potential customer’s thoughts and their typical behavior on search engines.
Properly chosen keywords improve the visibility of products to its targeted customer base.
SEO-Friendly Content and Blogging
Microweber includes built-in blogging features that enable business owners to create valuable content that attracts organic traffic. Product tips, industry news, or how-to guides relevant to the business’ niche encourage customers’ engagement and enhance SEO.
Store Preview, Launch, and Test
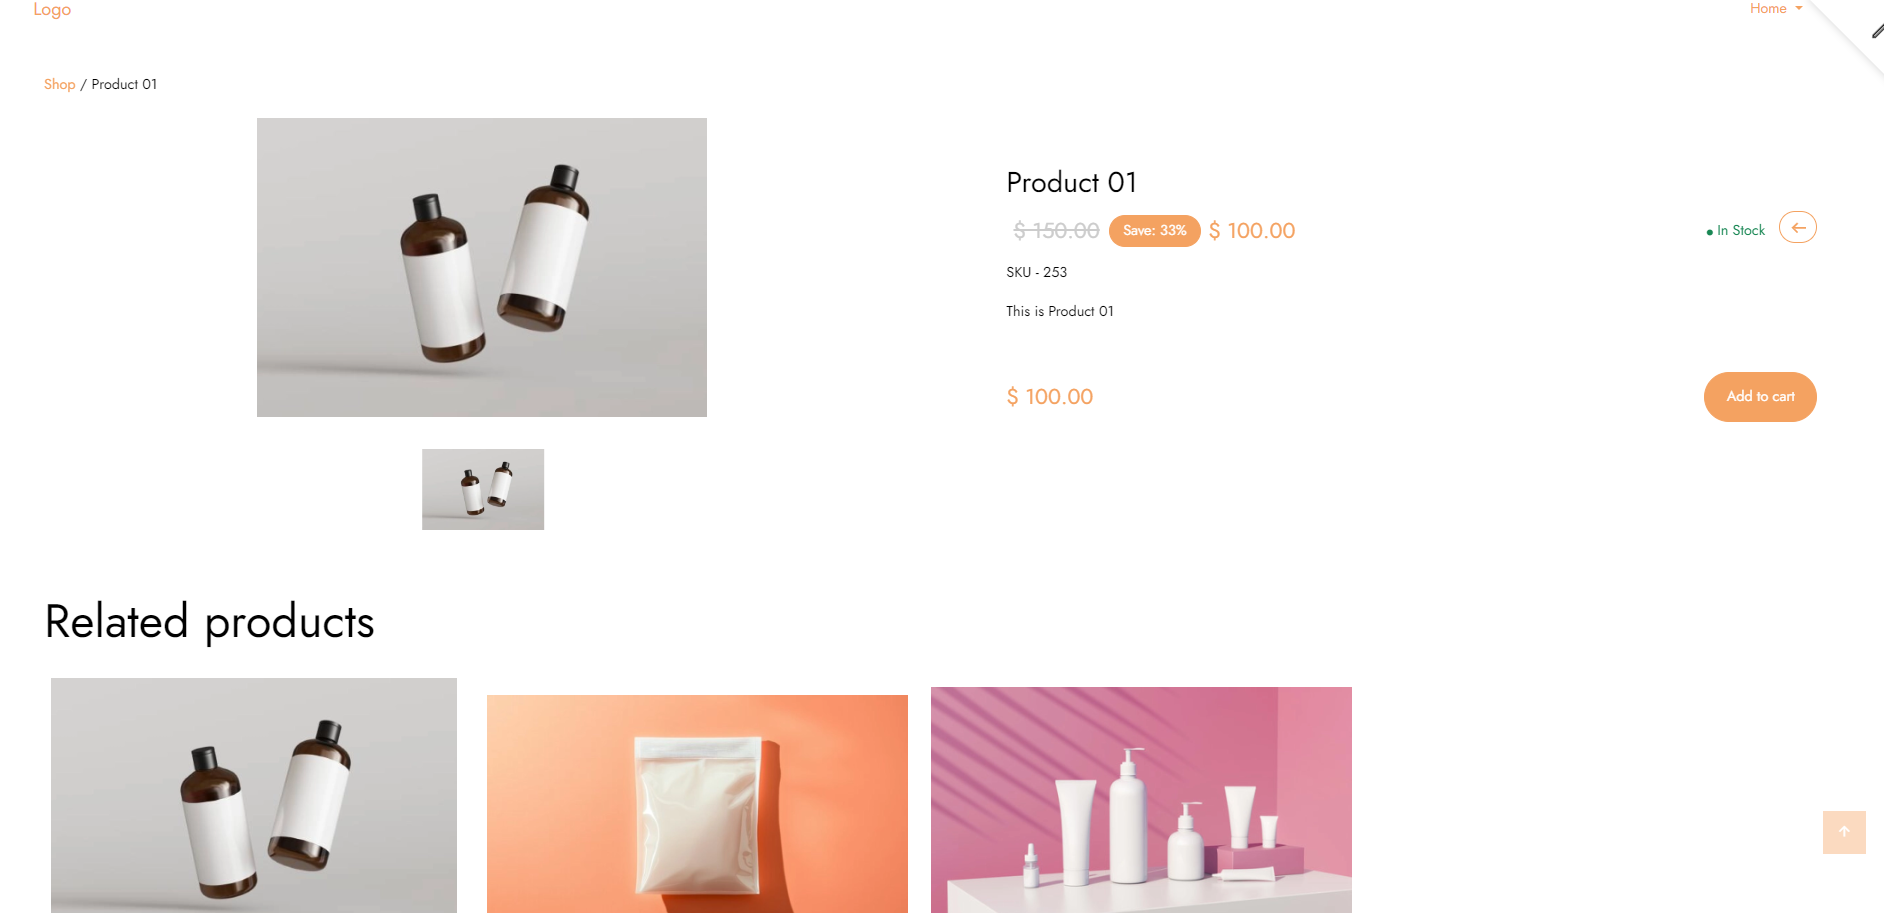 1. Previewing the Store:
Microweber allows for a ‘Live View’ which previews the store from the customer’s perspective, in order to ensure that all products, images, and descriptions appear correctly.
This step is essential as it helps in catching any errors, tweaking the functionality, and ensuring the store is visually appealing.
2. Launching the Store to the Public:
Once everything is ready, the last step is to click ‘Publish’ to bring the store to life.
3. Testing Navigation and Checkout:
A smooth shopping experience is crucial for a successful website. After launching, business owners can test their customer journey and ensure everything works smoothly.
Additional Customization and Management Tips
Mobile Optimization
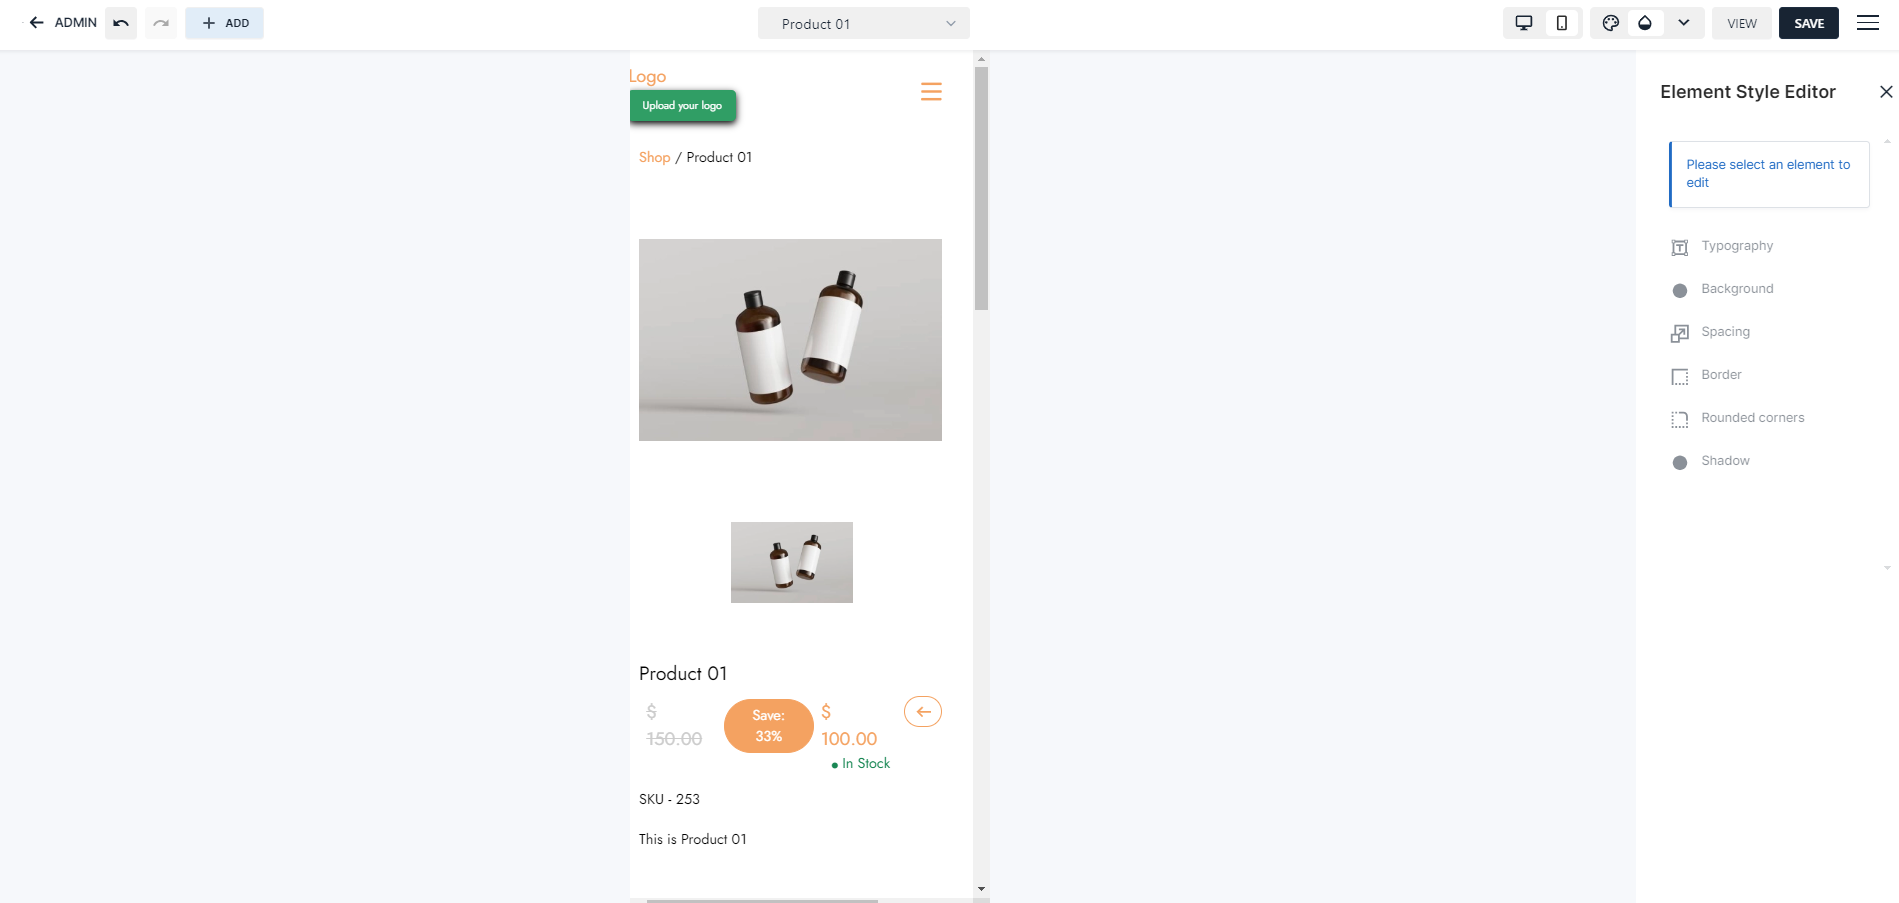 Mobile commerce is leading the e-commerce industry. A mobile-friendly store became essential as many customers shop through their smartphones or tablets.
Microweber templates are all mobile responsive, and through the ‘Live View’ option, business owners can ensure their customers have a smooth mobile experience.
Setting Up Payment and Shipping Options
Microweber integrates a variety of third-party plug-ins. These essential plugins include payment gateways (e.g., PayPal, Credit Cards), which are tailored to customers’ needs.
Analytics and Tracking
Microweber provides business owners with Google Analytics plug-ins to monitor their store performance. This enables tracking data and customer behavior in order to provide valuable insights and refine future strategies.
Conclusion
Microweber is the best way to create an accessible online store. This open-source CMS is a strong solution for every user who intends to venture into the world of e-commerce.
The site is designed to offer an intuitive drag-and-drop interface, built-in e-commerce functionality, and SEO capabilities so anyone can launch, operate, and manage his or her Web store.
Essentially, easy steps will be allowed to turn ideas into a live store for either entrepreneurs or business owners. Starting an online store with Microweber CMS will mean the right tools and strategies for growth and success.
FAQs
What is CMS?
CMS is an open-source content management system that enables users to create and manage websites and online stores. It includes built-in e-commerce features that make it accessible to users with minimal technical experience.
Can I use Microweber for blogging as well?
Yes, Microweber includes a blogging feature that allows users to create content with ease. Add a blog post to your website, improve SEO, and engage with customers through the published content.
What e-commerce features are available on Microweber?
Microweber provides users with essential e-commerce tools, including product management, stock tracking, pricing, SEO features, and payment gateway integrations. These tools enable users to seamlessly manage their online stores.
What are the key benefits of having an online store for a small business?
An online store expands reach, reduces overhead, and enables 24/7 sales. It also allows for efficient inventory and order management.
How can social media marketing help in growing an online business?
Social media boosts brand visibility, engages customers, and drives traffic. It helps businesses build loyalty and increase sales through targeted content.


